LESSON 6
Botanicals
There’s nothing man has ever made that is more beautiful than anything nature has ever made. No one stands a chance in outdoing what grows from the earth, so you might as well collaborate.
Mathematically speaking, all of nature’s forms are perfect and, in addition, they tell delicately poetic stories, full of gesture and drama, comedy and relief. Since most of your job is actually to be a storyteller, when you choose to use nature in your home or in your products and idea, most of your job has already been done for you.
Simply put: If you want to instantly make anything you do look twice as good, work with botanicals. Easily one of the most powerful tools any amateur or professional stylist & storyteller can utilise, botanicals are unfairly overlooked and here’s where we can swoop in and use them as a tool in our toolkit.
I like to think of botanicals as a way of bringing life to any project, like we discussed in your Advanced Style lesson. And if you go down our list of styling 10 styling principles to always guide you, botanicals hit every single one.
In this chapter, I want to get straight to the point and give you a simple framework to refer to when selecting and curating botanicals in your project, then teach you my three go-to arrangements that you can scale up and down, and will cover you in almost any situation that arises.
Welcome to my flower shop!
“There is a pleasure in the pathless woods,
There is a rapture on the lonely shore,
There is society, where none intrudes,
By the deep sea, and music in its roar:
I love not man the less, but Nature more.”
— Lord Byron
Lesson: Consider Your Space
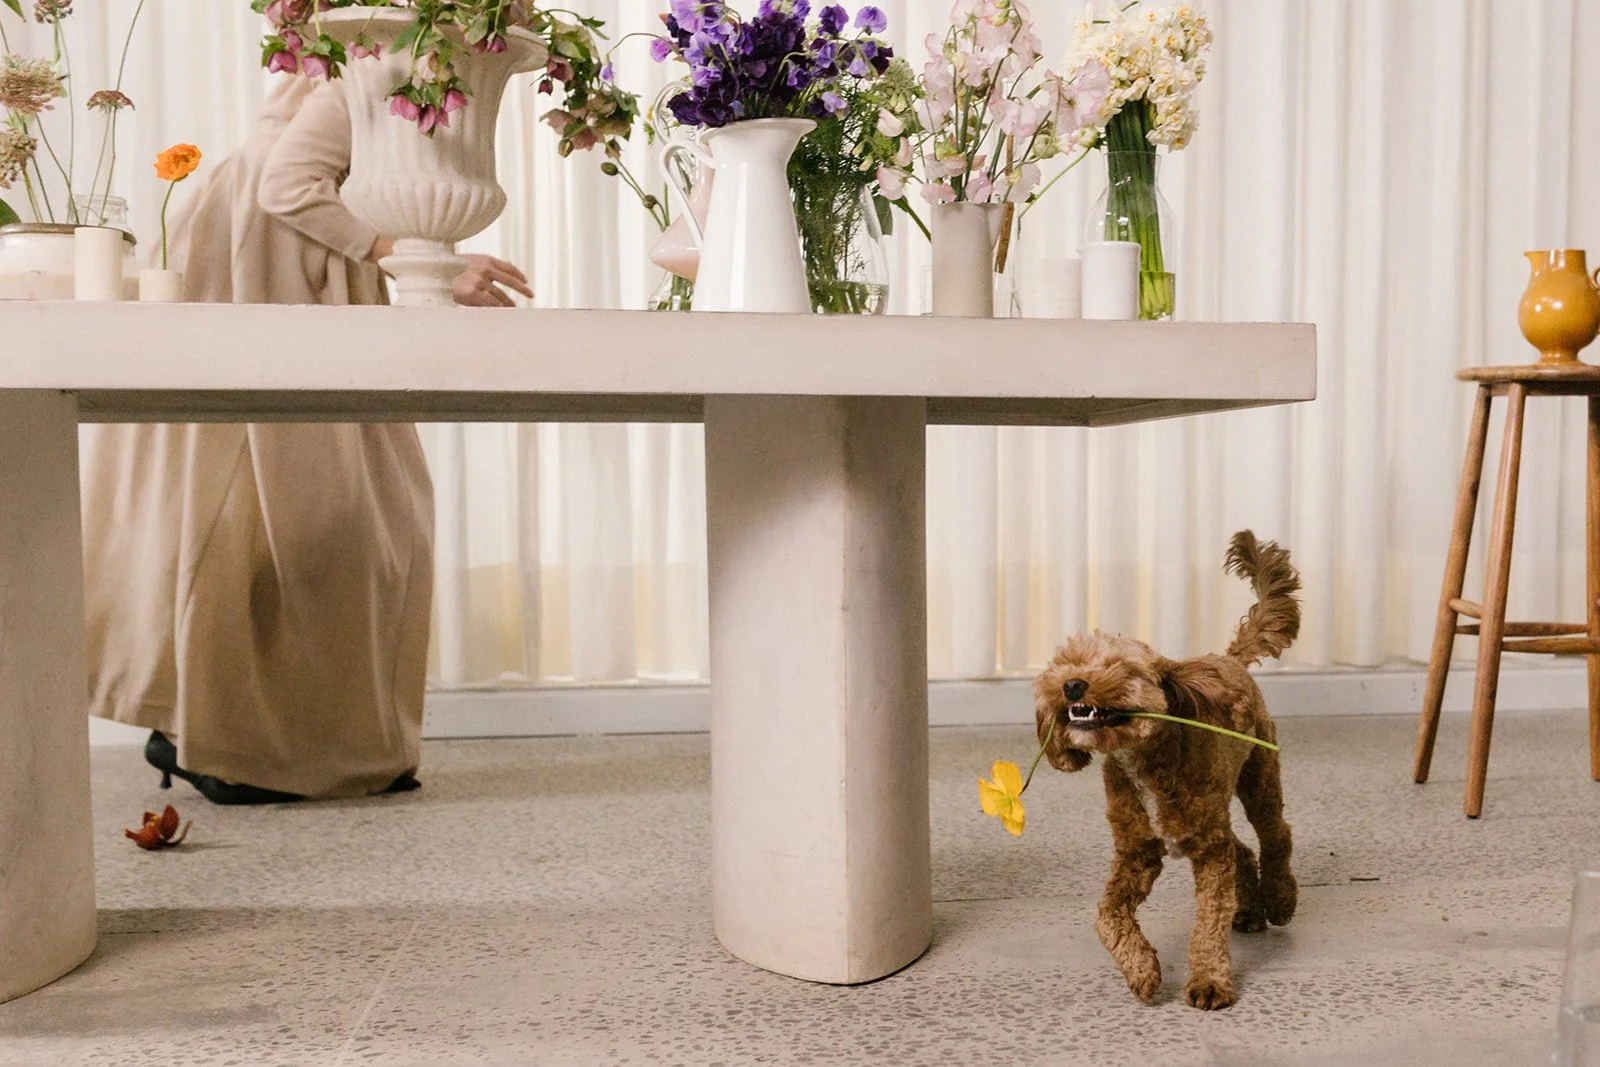
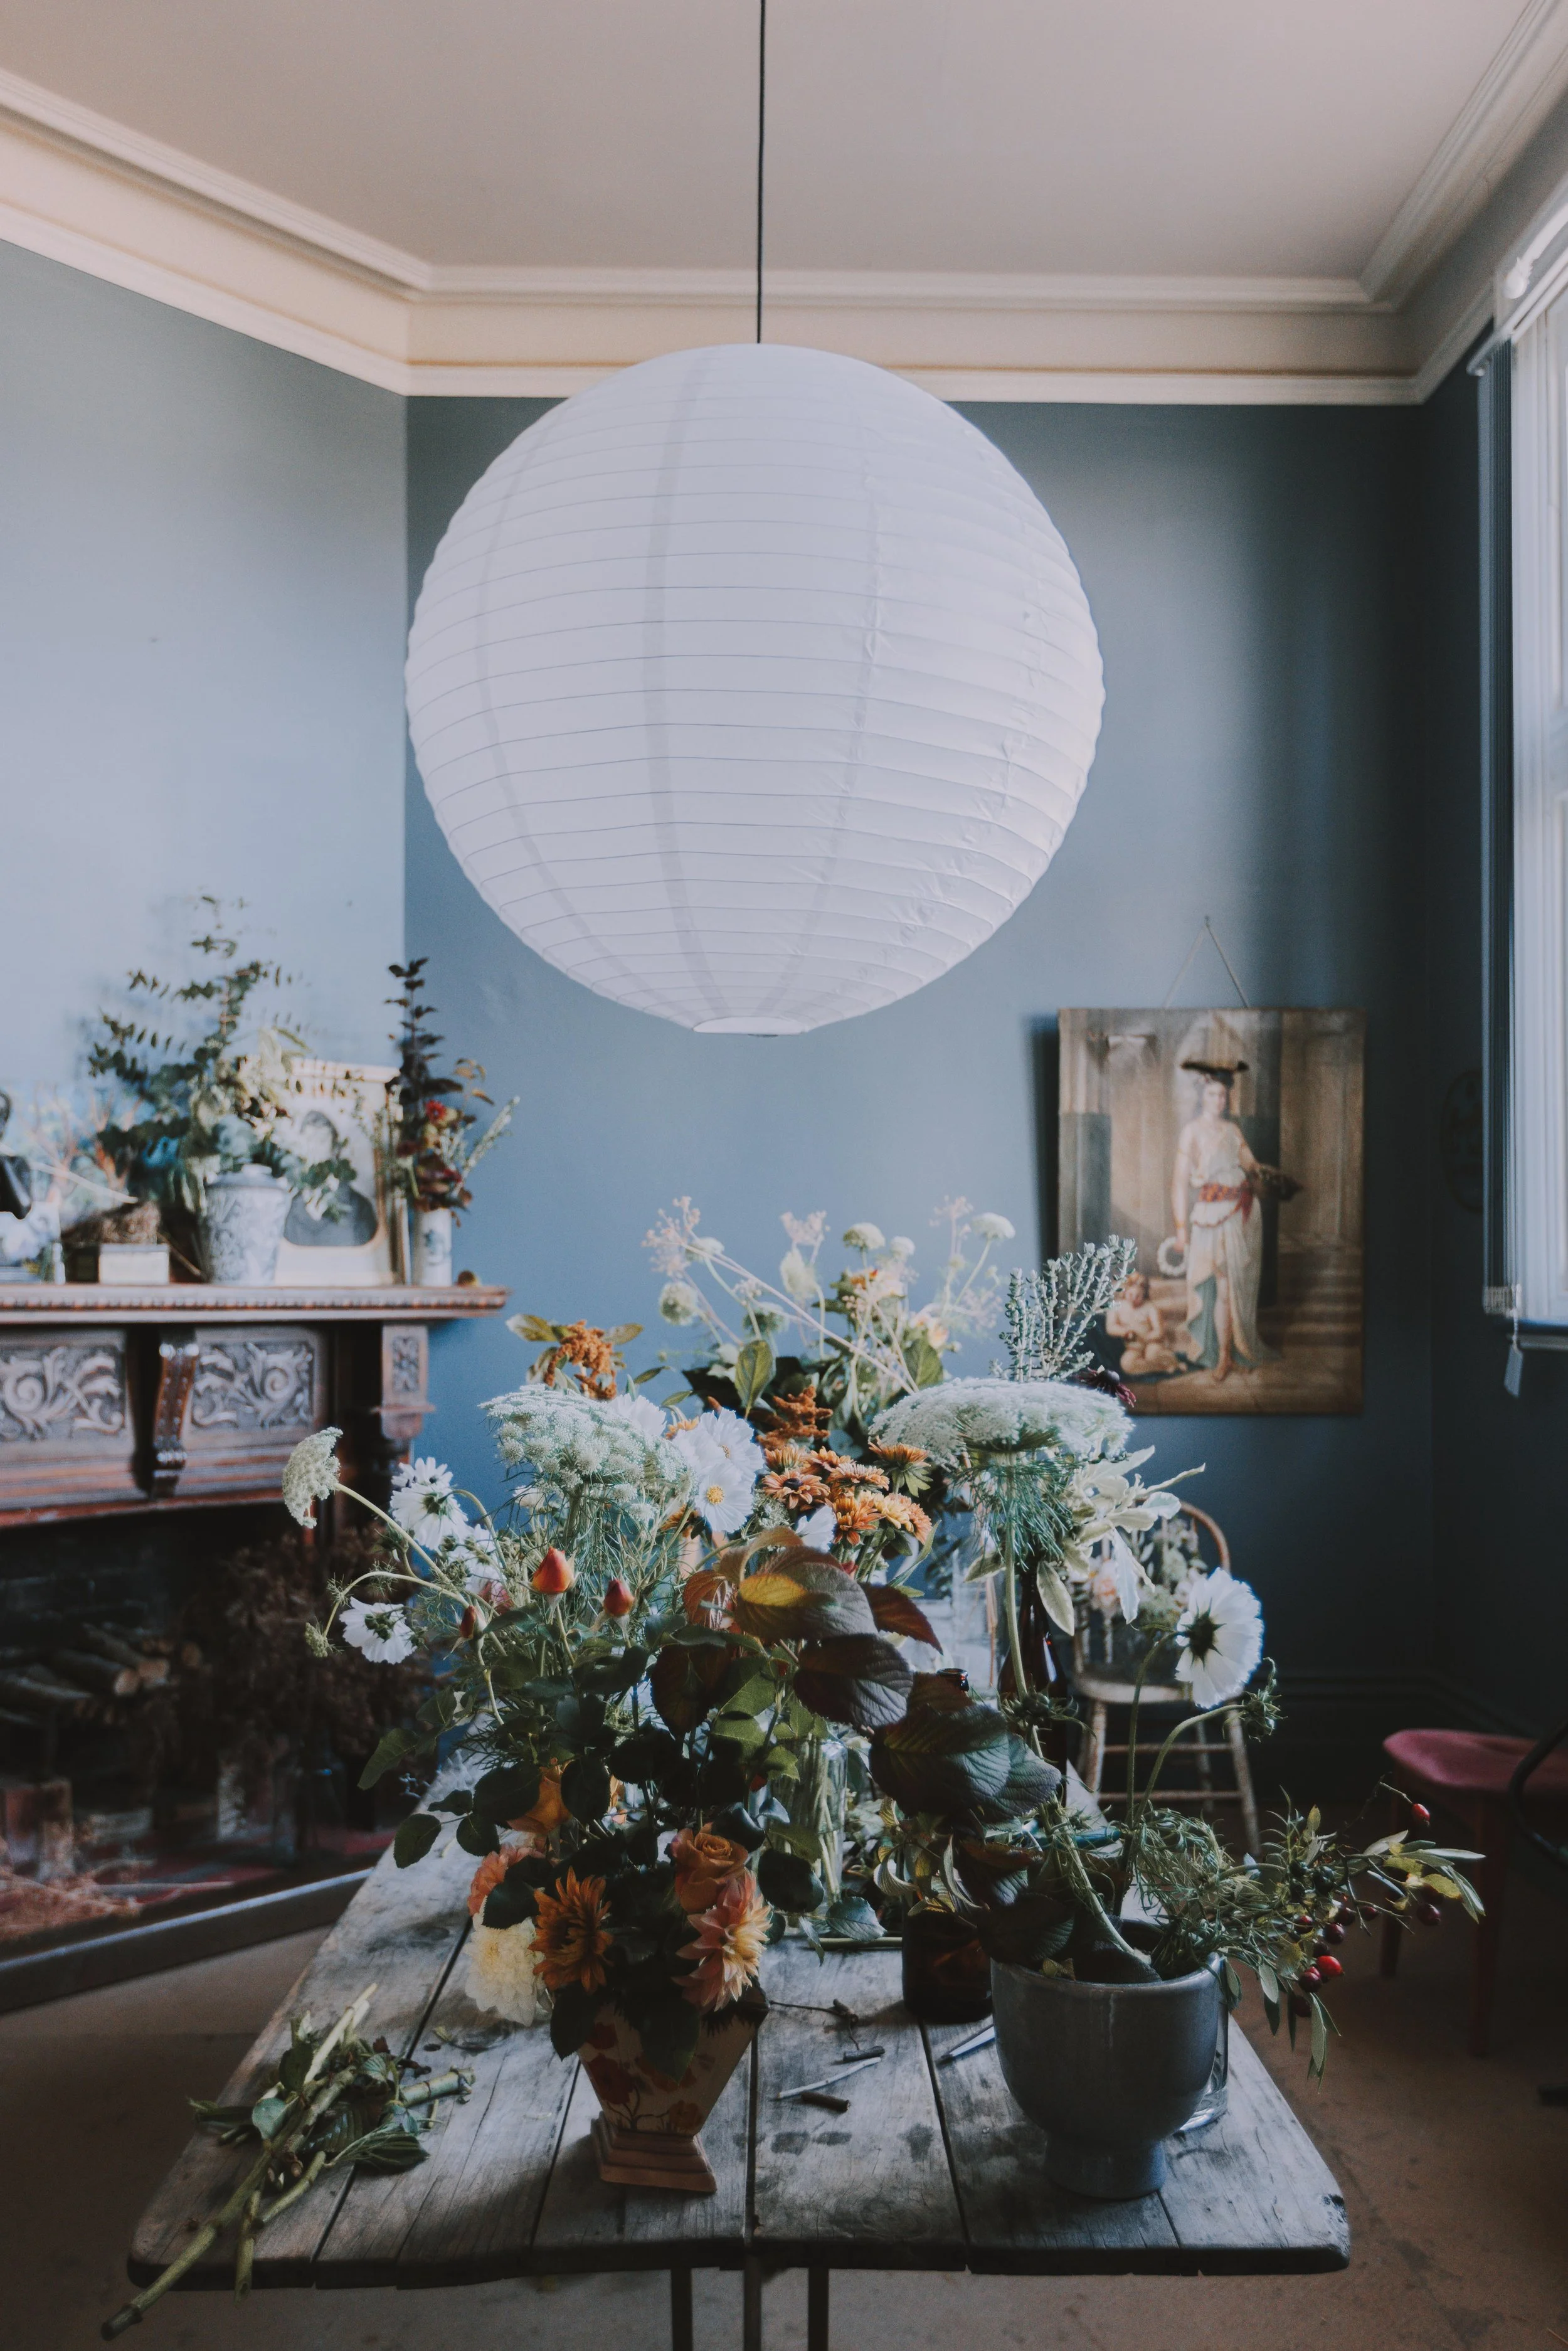
When you are looking to incorporate botanicals, the first item to consider on your mental checklist is the size of the space you are working with. Perhaps you have a giant workshop like in our image example below, perhaps you are working with a desk or a small shelf, or perhaps you are working with your packaging for products. The space you have, and subsequently the ratio of botanicals you will want to use in it, needs to be thought about first and foremost.
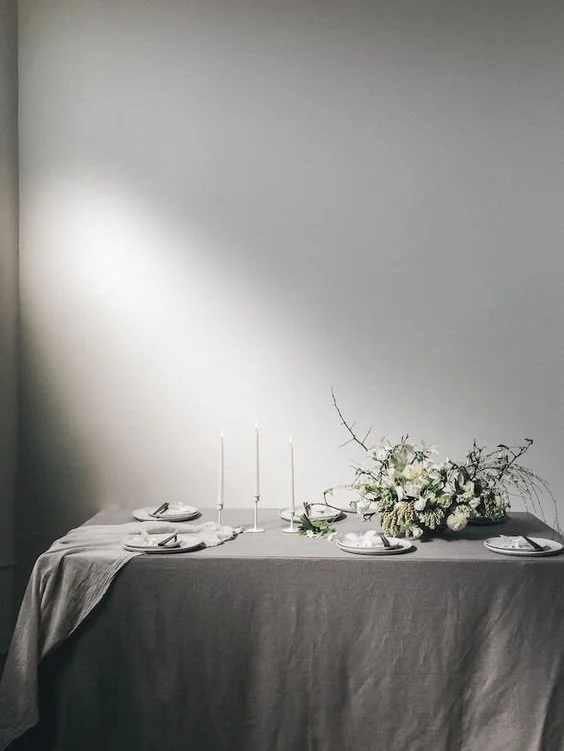
Think about it, if you have a giant double height space, no amount of normal sized lovely arrangements are going to make an impact. Or say you are wanting to set a table for a dinner party, you are going to need to consider something low, small and breezy so that your guests can use the table practically, and see each other through your table settings.
Think about the setting and size of your project first, and roughly the ratio of botanicals you are going to need. Our three go-to arrangements can be scaled up and down, and in this lesson, I’ll give you visual examples of that so you will be fully prepared for any styling situation!
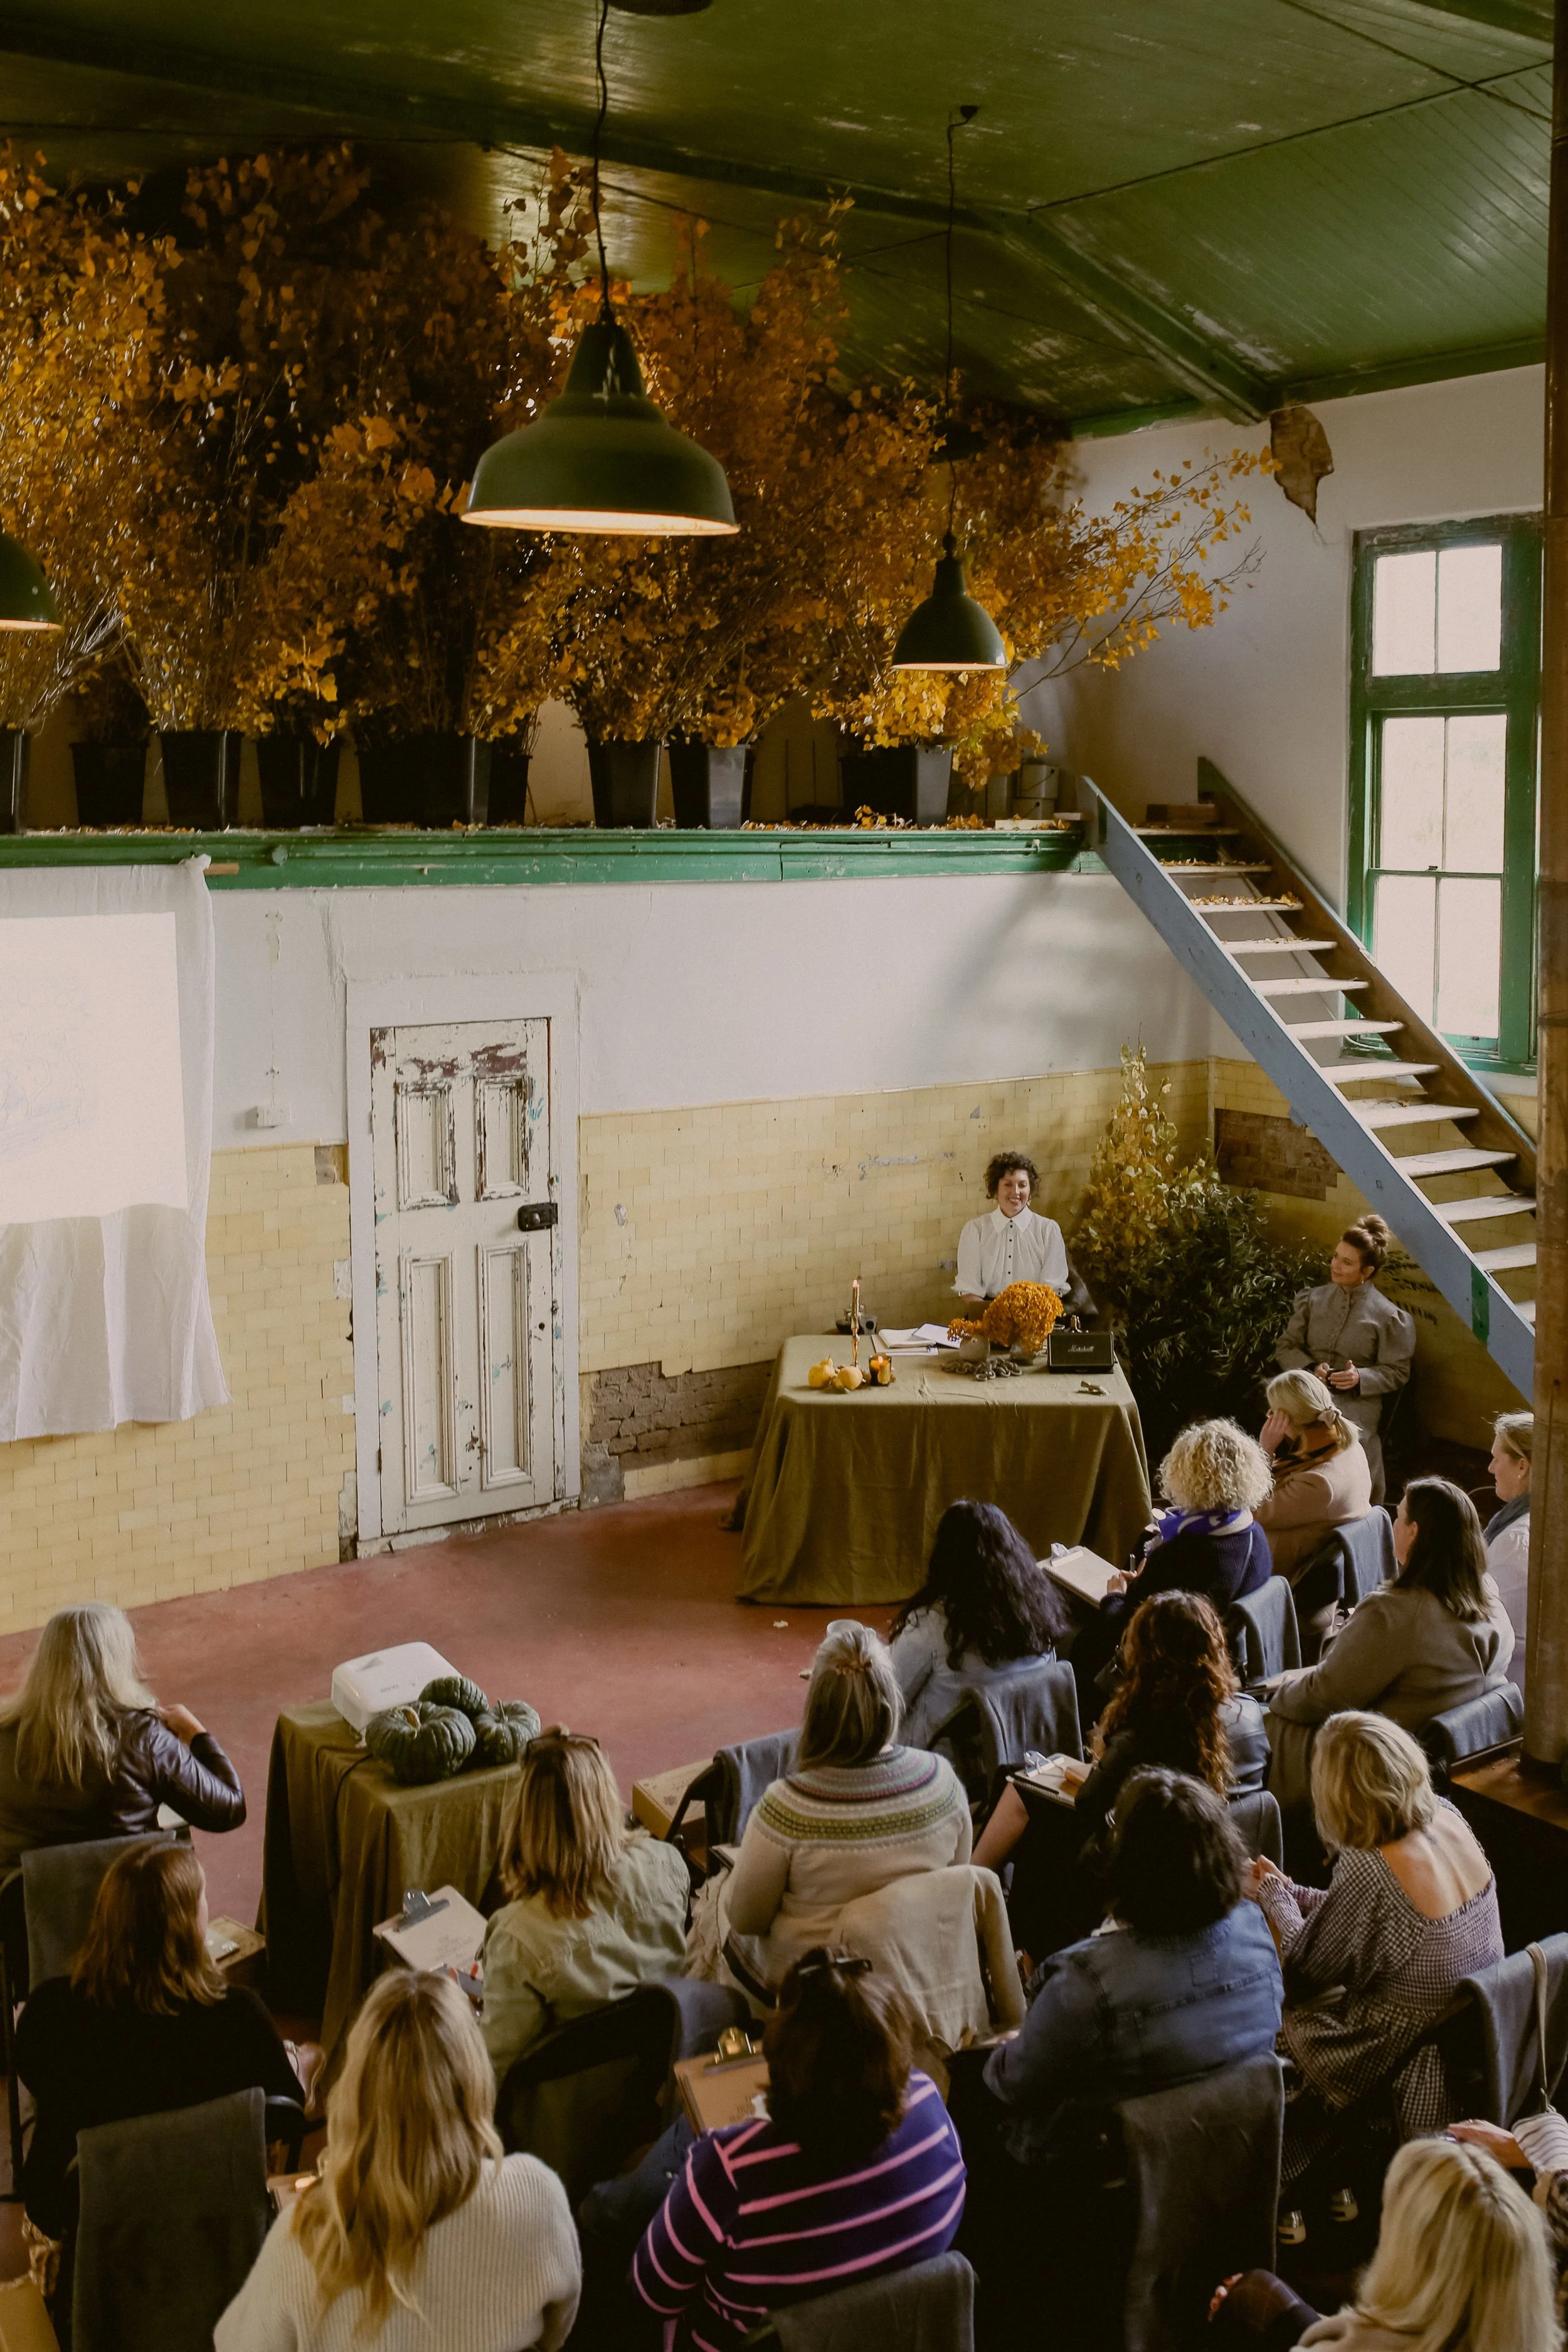
Real world example: Here are some images of how we used botanical styling in varying scales to suit different spaces. In the cavernous workshop space, we used tree branches to fill the voids, like the loft space and the space behind my desk. In smaller moments, such as on my teaching desk and the little table our projector sits on, we’ve used simple and small botanical moments – dried autumn leaves from the tree branches, and fruits of the season, including pumpkins and quinces.
Workbook Time. Reach for your workbook, and complete Questions 6.1, now. Time to consider what spaces we are working with.
Lesson: Consider Your Surroundings
The next item you need to mentally consider is your surroundings. Think about this in terms of what is happening in nature around the setting you are styling within, and also what the season is. Whenever our team are working on styling a home or product for a photoshoot, or styling one of our teaching events, the first thing we all do together is go for a lovely nature walk.
What we are trying to ascertain is what’s around us, and when it is that we’re looking. I’ve included the checklist in your workbook so that you may use it forever more.
What botanicals surround us? Do we see flower beds and gardens? Trees and shrubs? The sidewalk and street trees? Grasslands or beaches?
What is the season? Is it autumn when things feel dry and papery? Is it spring when everything feels dewy and fresh?
What colours do we see in nature? Every setting will change its palette drastically month to month.
This information helps guide us to what we can gather and use from our environment, but also, very importantly, what we source and bring in to pair with it all. Let’s continue on with our event styling example below to show you what we mean by this, before we turn to our workbooks and consider our projects for ourselves.


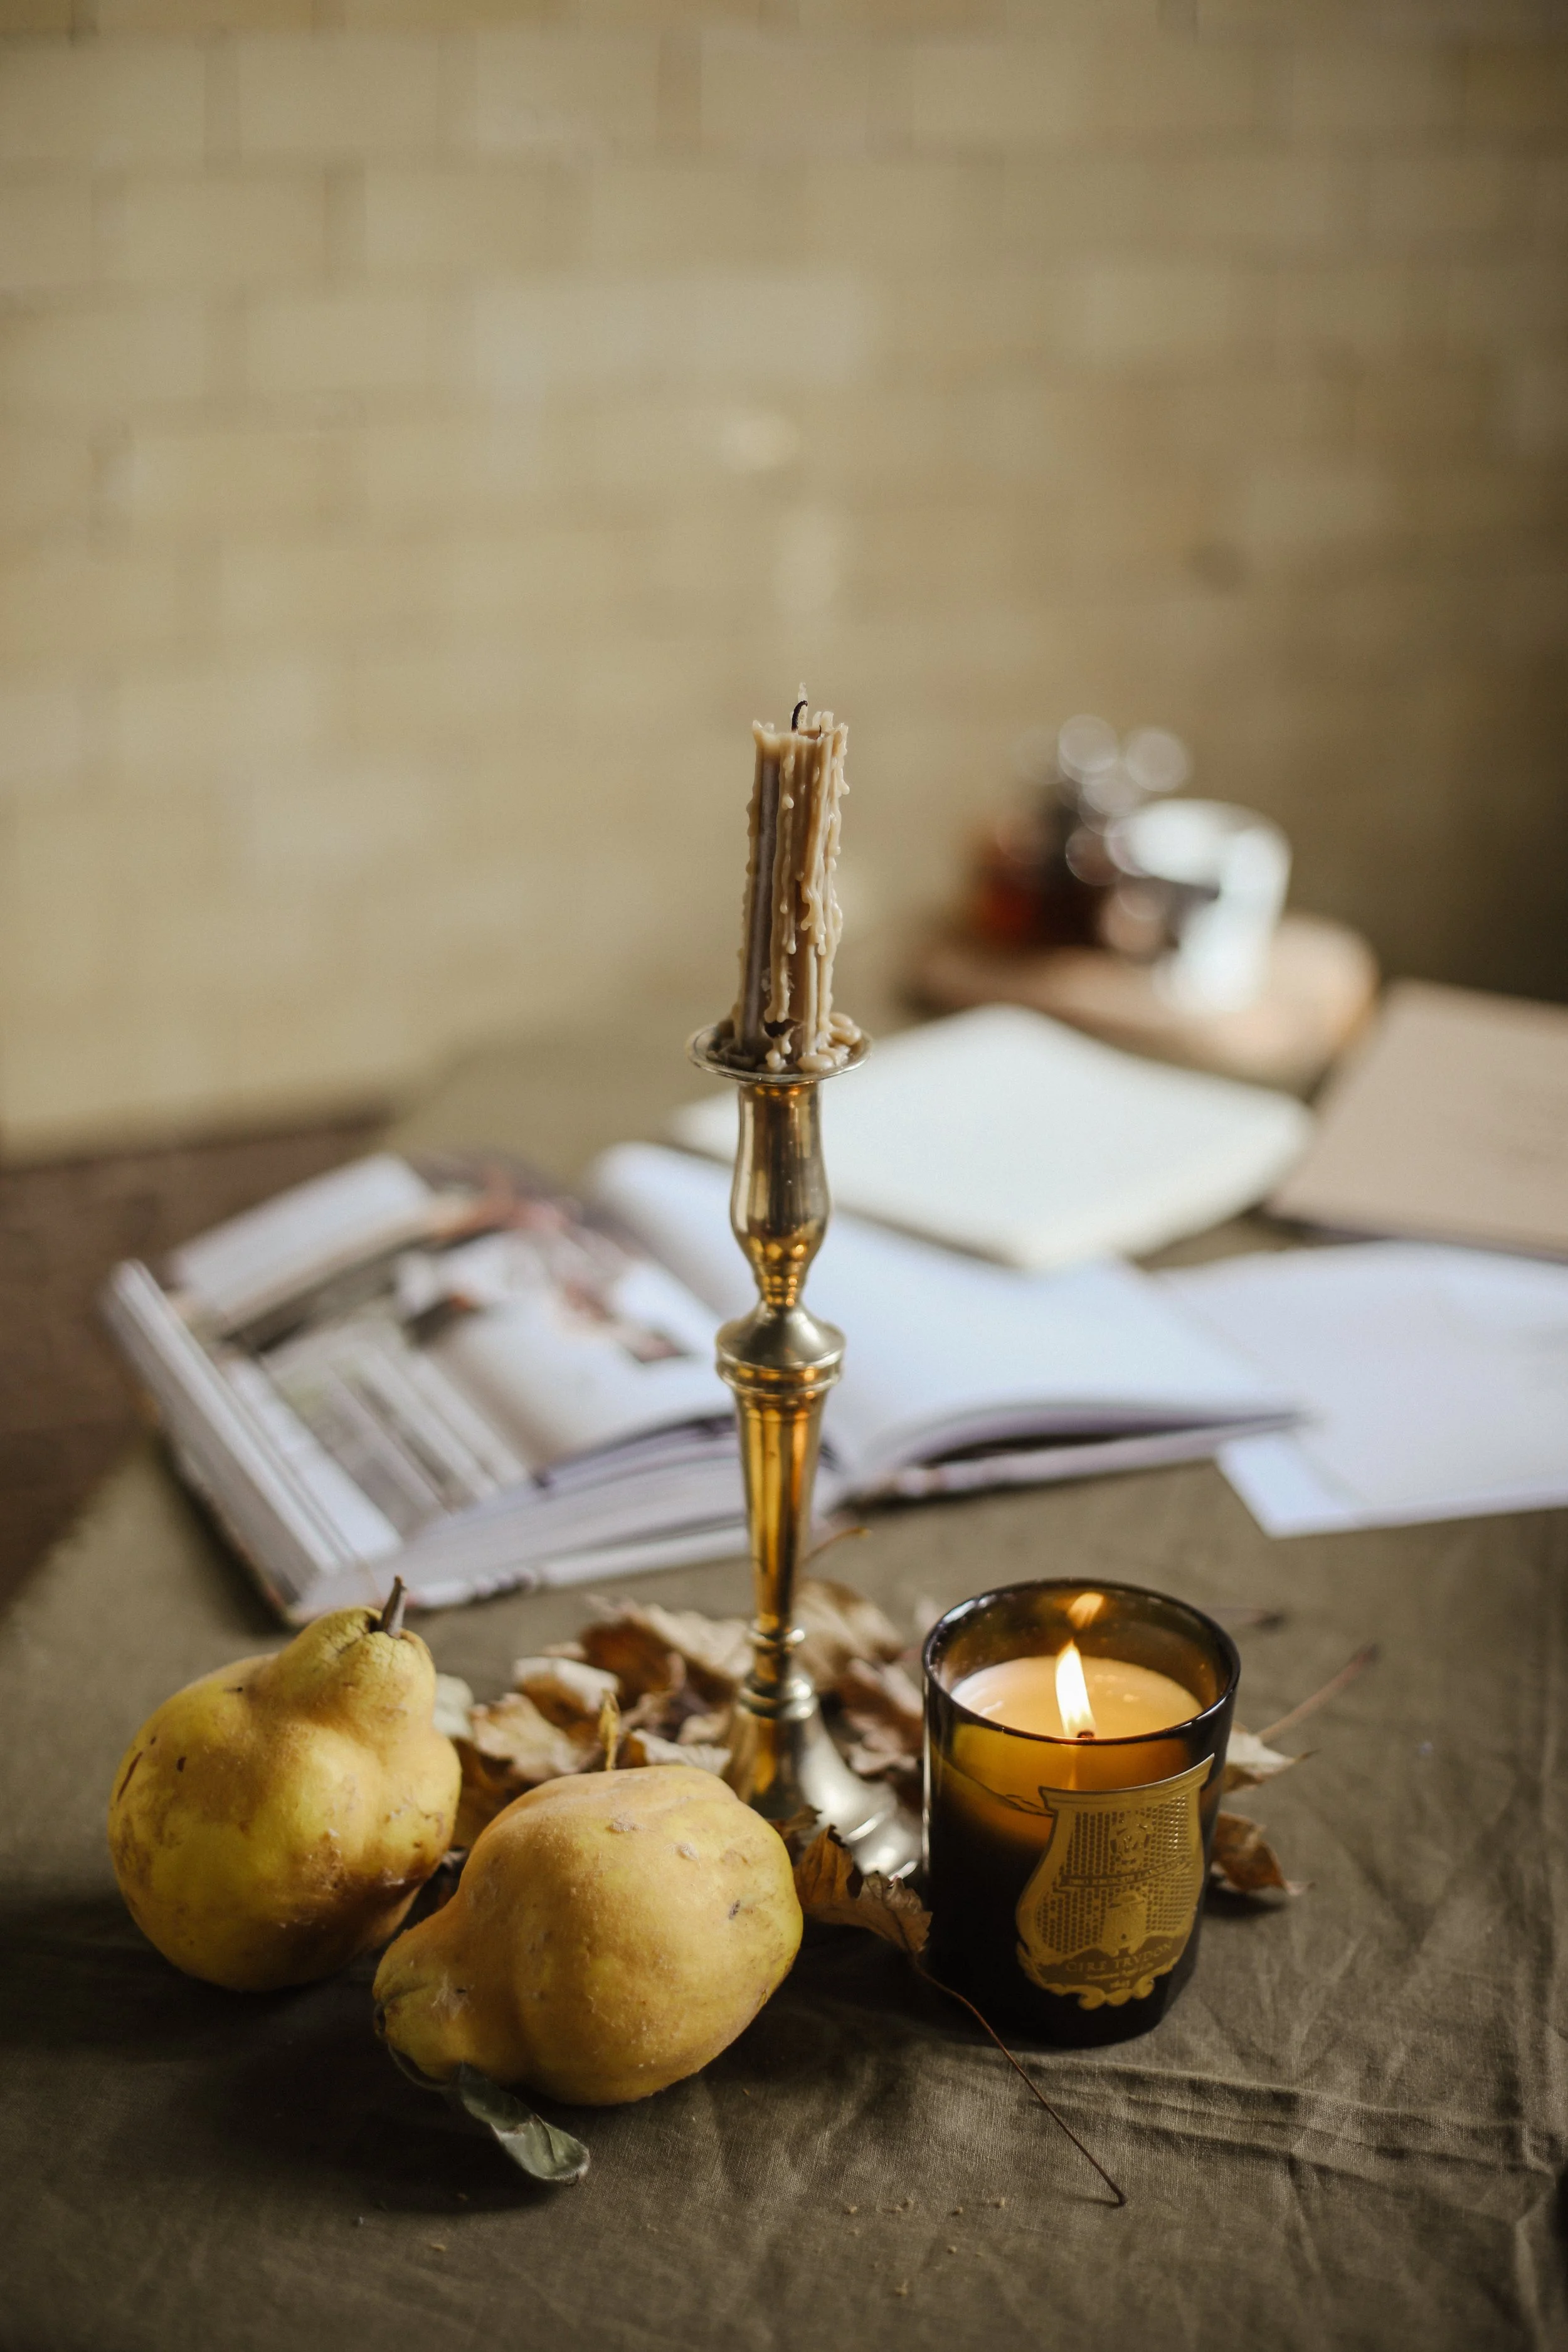
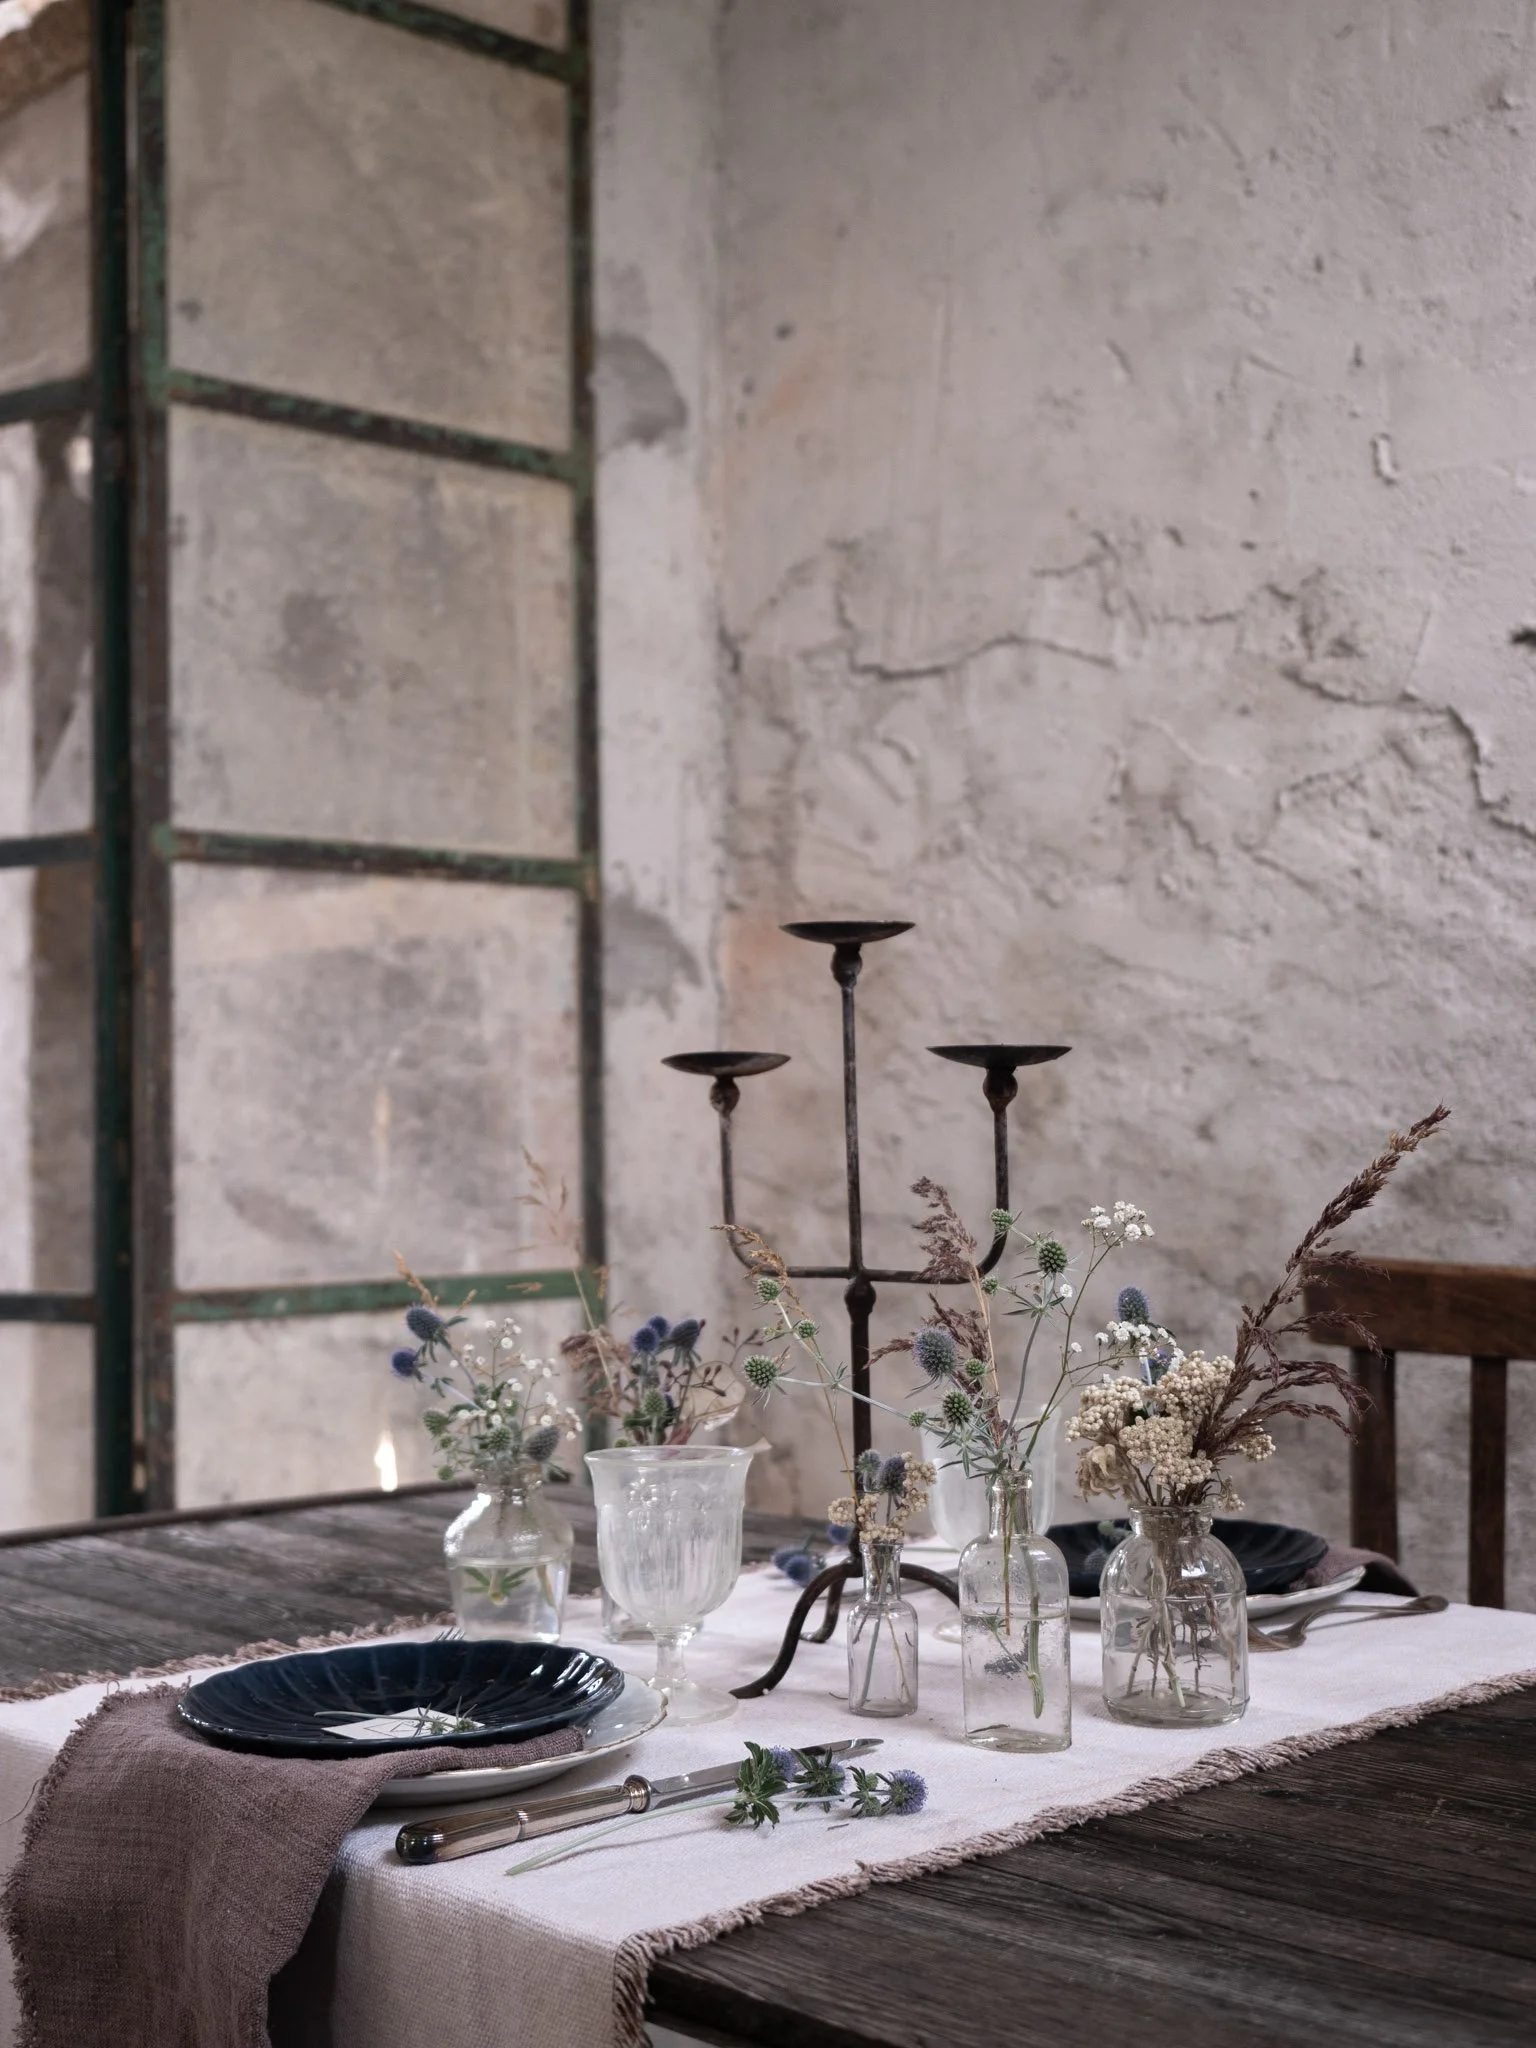
Considering our surroundings: This is key to being an Advanced Stylist. Take note of how we have styled this table for our event, in this particular space. We noticed the colours and textures of our surroundings, and mirrored this in our choice of candlesticks, stoneware and table linens. Instead of fresh flowers on the table, we have chosen dried grape vine leaves from just outside the entry to the venue.
Workbook Time. Reach for your workbook, and complete Question 6.2, now. Let’s open our eyes and explore our surroundings.
Lesson: Consider Your Schedule
The final thing to consider is how long you would like your botanical elements to last! If you’re styling for a product or home photoshoot, what a win! Your styling only needs to last a few hours, so those delicate spring flowers could be perfect. You might be styling a retail space or simply your home – so perhaps you would like to get a week or two out of your styling. In that case, maybe tree branches, fruits or blooms that have a hardiness to them, such as roses and chamomile, could be considered. Or, maybe you’re looking at more semi-permanent options for a remotely managed Airbnb or your work space – you could consider dried botanical options, seeds and shells, or silk or ceramic flowers. Finally, let’s say you are here to design your packaging or your website – your schedule is permanent and your choice comes down to considering botanical illustration or photograph if that fits the story you’d like to tell.
I’ve made things easy for you, and given you a list in your workbooks of good fits for various types of schedules. But before we turn to it, let’s explore various botanical styling examples in projects we’ve worked on in the past with differing schedules.


A real world example of schedule: This is in a project we completed a few years ago – an Airbnb called Captains Cottage in Hobart, Tasmania. Considering schedule, we used lovely delicate spring bulbs in the styling for the website, Instagram and press images – and then, after the shoot, swapped these botanical items out for semi-permanent options, including a branch of cotton and dried proteas, which should last up to 6 months.


Another beautiful home we have styled, Ethelmont Rise also in Hobart, Tasmania, which showcases more permanent ways of using botanicals, in the William Morris wallpapers and dried fennel flower, along with the occasional posy of fresh garden roses when in season from the gardens outside.
Workbook Time. Reach for your workbook, and complete Question 6.3, now. Let’s consider the schedule we hope to work with.
Lesson: Your Go-To Arrangements
Now we have really understood the three foundations for using botanicals in your spaces and projects, let’s give you three simple tools for bringing them to life, no matter the space, surroundings or schedule.
There are just three types of arrangements you can use in almost any situation, as we saw in our video overview. This part of your lesson today goes over them one more time, and gives you visual examples of each used in different combinations and scales.
One Ingredient in a Narrow Neck Bottle.
Firstly, let’s look at one ingredient in a narrow neck bottle. Key things to remember about this arrangement.
It’s the narrow neck of your vessel which holds your arrangement correctly in place. These types of vase, from bud vases all the way up to large pots you could use for tree branches, are key items to collect for your styling tool kits.
You must first make sure to fill your vessel with water or – for larger arrangements – perhaps sand or stone – otherwise you are at risk of them tipping over once you pop your botanical element in.
As a general rule, think about the rule of thirds when in comes to scale. One third should be vessel – and two thirds your arrangement coming out of the top. See if you can spot this rule at play in our examples below.

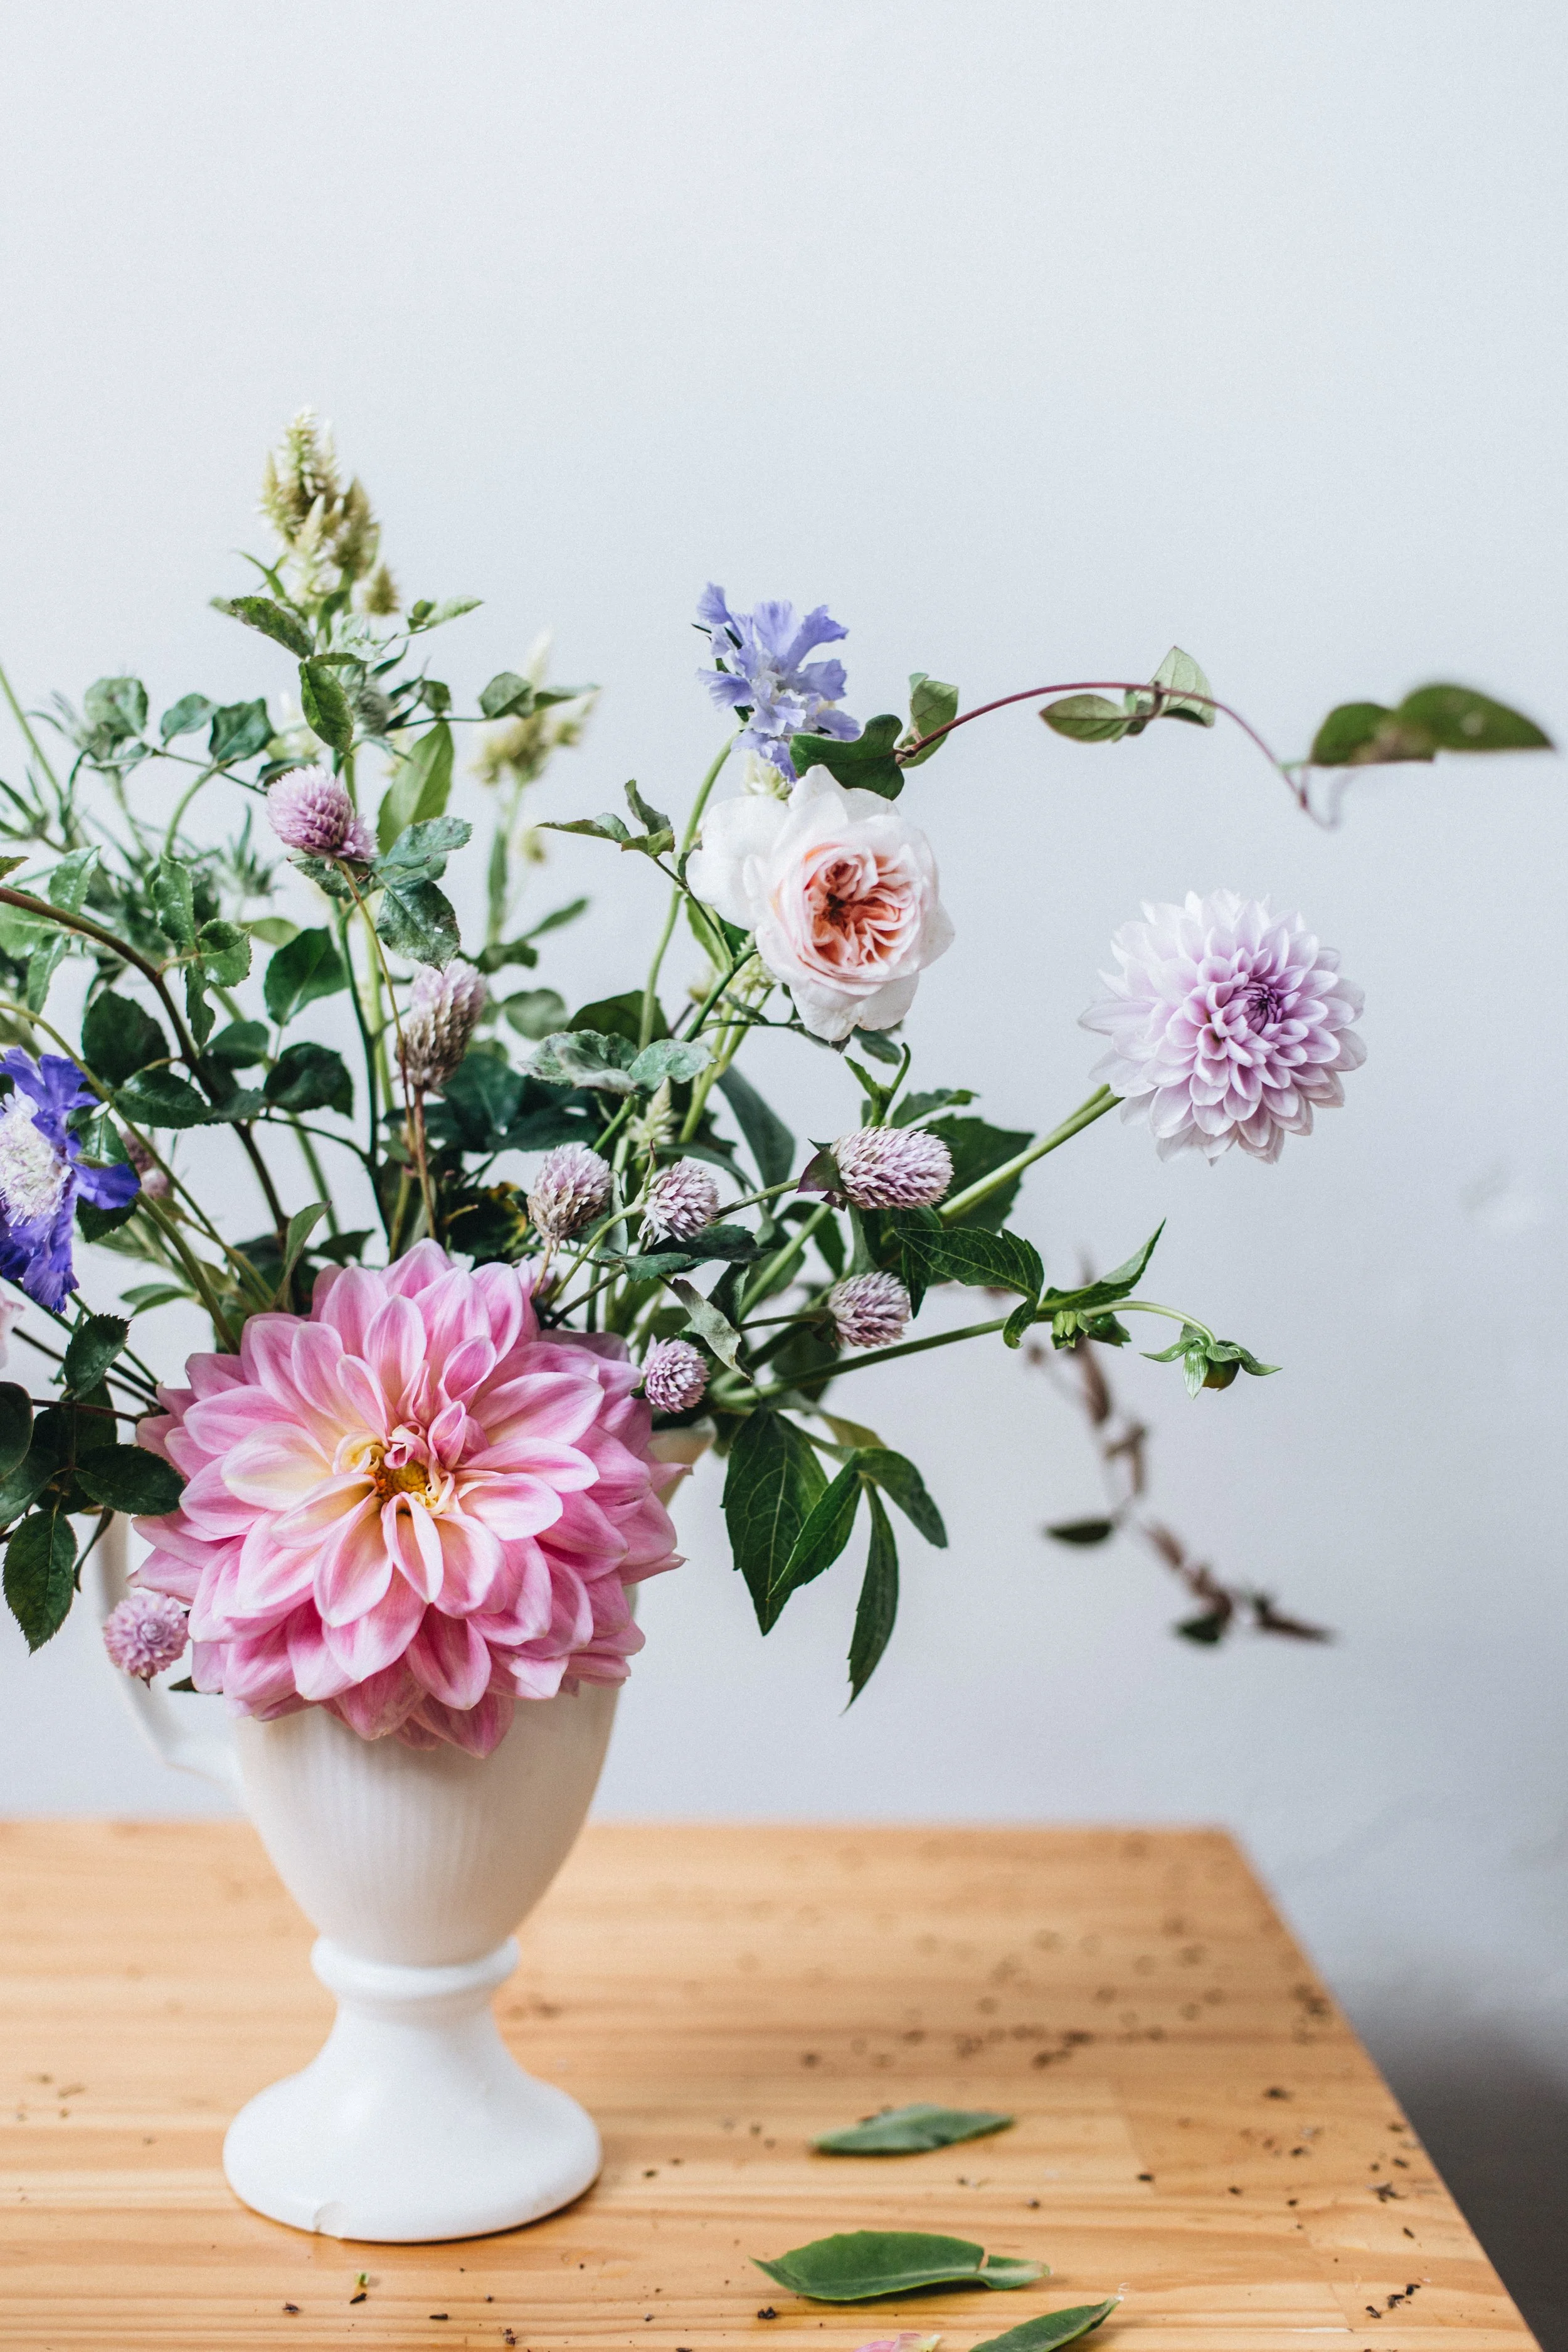
A lovely swooping rose branch at Ethelmont Rise, sourced from the garden outside. Note the height of the arrangement. One third is the glass vessel, and two thirds of the height of the arrangement is the rose branch – even though its actual length is longer.
Styling a workshop event in Byron Bay, the effectiveness and simple beauty of a single bloom in the correct vase cannot be topped!
Simple styling at Villa 61 in Italy, from my book, Principles of Style. They have taken the single ingredient in a vase and used in en masse to create a beautiful table setting.

And lastly, a dried moss branch at Captains Rest. I would have preferred a larger vessel to hold it in place; however sometimes you just need to use what you have on hand if you’re working in such a remote setting!
From the above examples, you can see what a powerful tool this simple arrangement is in your arsenal. The key is having a variety of size, colours and textures of that narrow-necked vessel in your styling cabinet – and away you go.
Ikebana Arrangements
Next let’s explore an arrangement that is slightly more complex, but also surprisingly easy and beautiful if you have the right equipment at hand – the beautiful and iconic ikebana arrangement. Ikebana originated in Japan as a form of flower offering, and you are going to need two tools in your kit to execute this arrangement.
Firstly, a kenzan – which literally means “sword mountain” in Japanese, which I just love! It is also referred to as a flower frog, or pin frog. A kenzan sits in your vessel – it’s a heavy plate covered in needles that you fix the botanicals onto. You can find these secondhand in thrift or antique stores — which I personally prefer – or you can purchase them new by searching for kenzan or flower frogs online. They are so incredibly useful; I have more than I can count in my styling drawer at home, our event styling toolkit on the road, and in my secret styling stash in my cabin, Captains Rest.
Secondly, the type of vessel we use for this arrangement is the opposite to the first. We are looking for lovely open-mouthed vessels, and ones that are generally solid rather than made from glass, so our kenzan remains hidden. Let’s explore some visual examples below.
Our botanical stylist, Eliza Rogers teaching at one of our live masterclasses – the kenzan is placed in your vessel, and you simply mount your botanicals on top! Easy, and beautiful. It’s a nice idea to keep a triangle form in mind when arranging, a high point – and two low points.
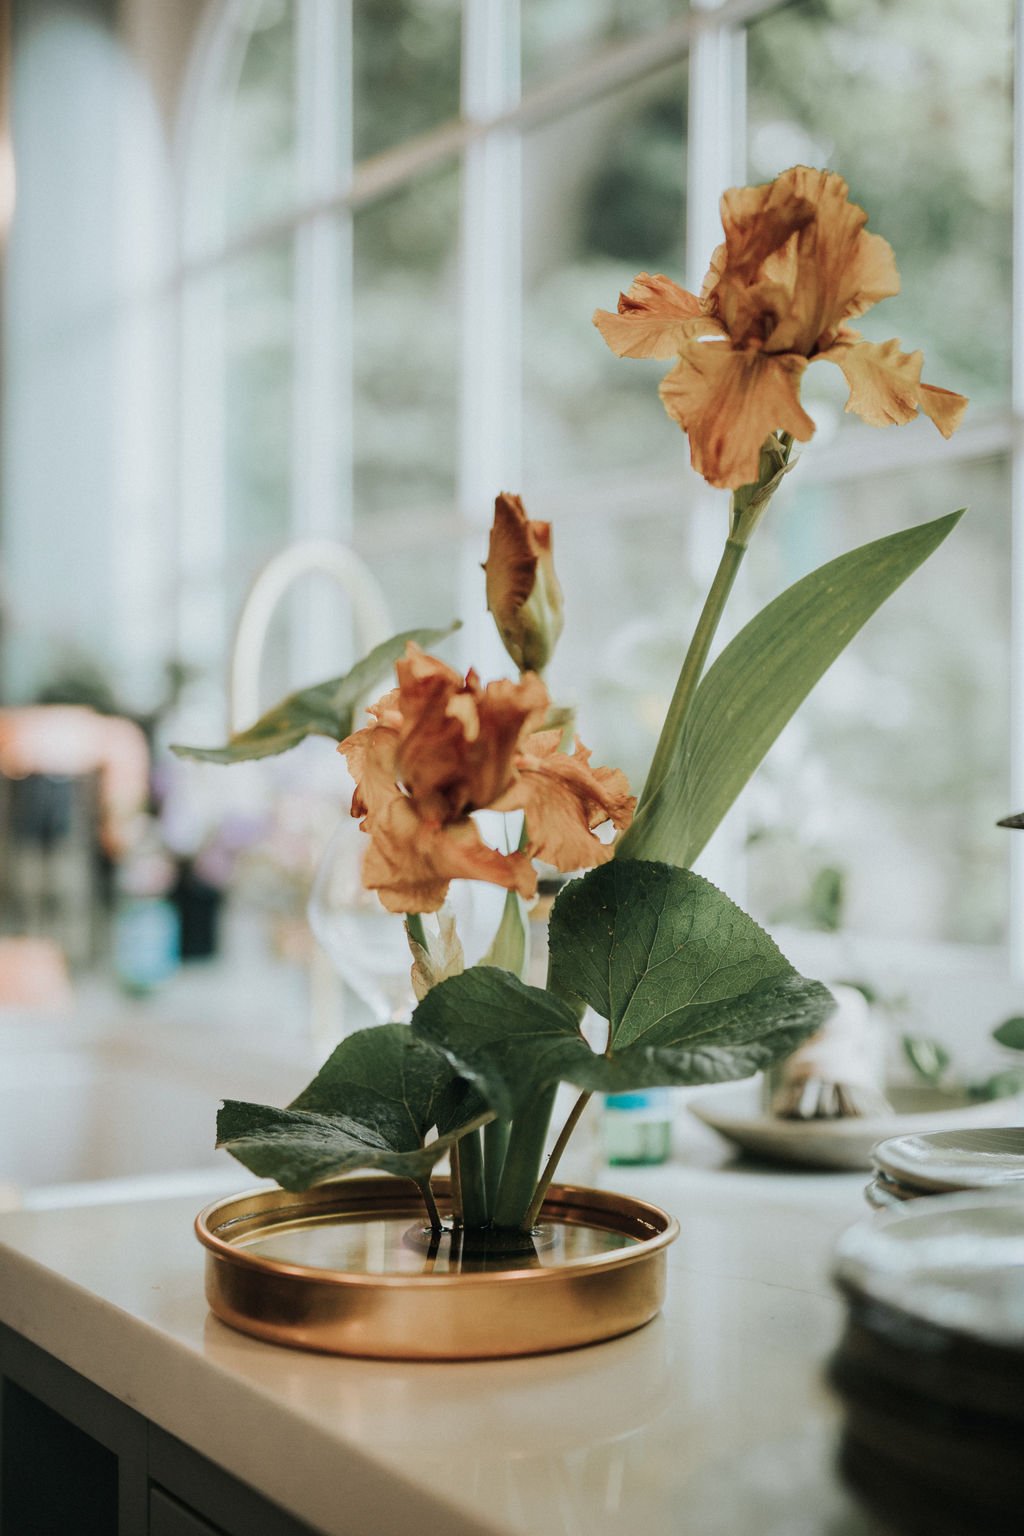
A beautiful student Ikebana arrangement from one of our events; see how the the types of botanicals all work perfectly with each other, and the chosen vessel reflects the lovely copper coloured blooms. Also note its triangular form.
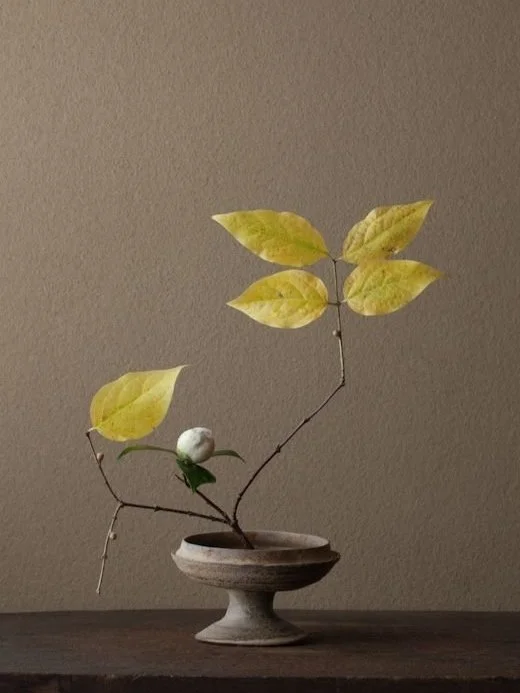
A piece by Ikebana Master Toshiro Kawase. There are no rules to forming an Ikebana arrangement, but the idea is to mirror forms in nature as closely as possible.
Textbook example of how easy it is to style a product shot or table with Ikebana by stylists, Once Wed. This excellent tool can be used simply, or en masse for varying effect.
By now, we have learnt two key botanical styling go-to arrangements, and we have also started to understand some basic theories about all botanical styling including:
Pairing elements that work nicely together, instead of clashing
Forming loose triangles
Trying to mirror how botanicals form in nature, with space and varying heights
Complex Arrangements
Now, let’s take everything we are learning about botanical styling, and put it all together in our final go-to arrangement – one that’s larger and more complex. You would use this tool if you would like to go all out, and create something special for your table tops, weddings, showrooms etc. You can use fresh or dried ingredients here; the key is really in understanding how the mechanics of this type of arrangement work, which is generally down to the chicken wire you can obtain from your local hardware store. Please wear gloves, it can be a bit tricky to scrunch into your chosen vessel!
Let’s explore some examples of this final go-to arrangement in your tool kit below.

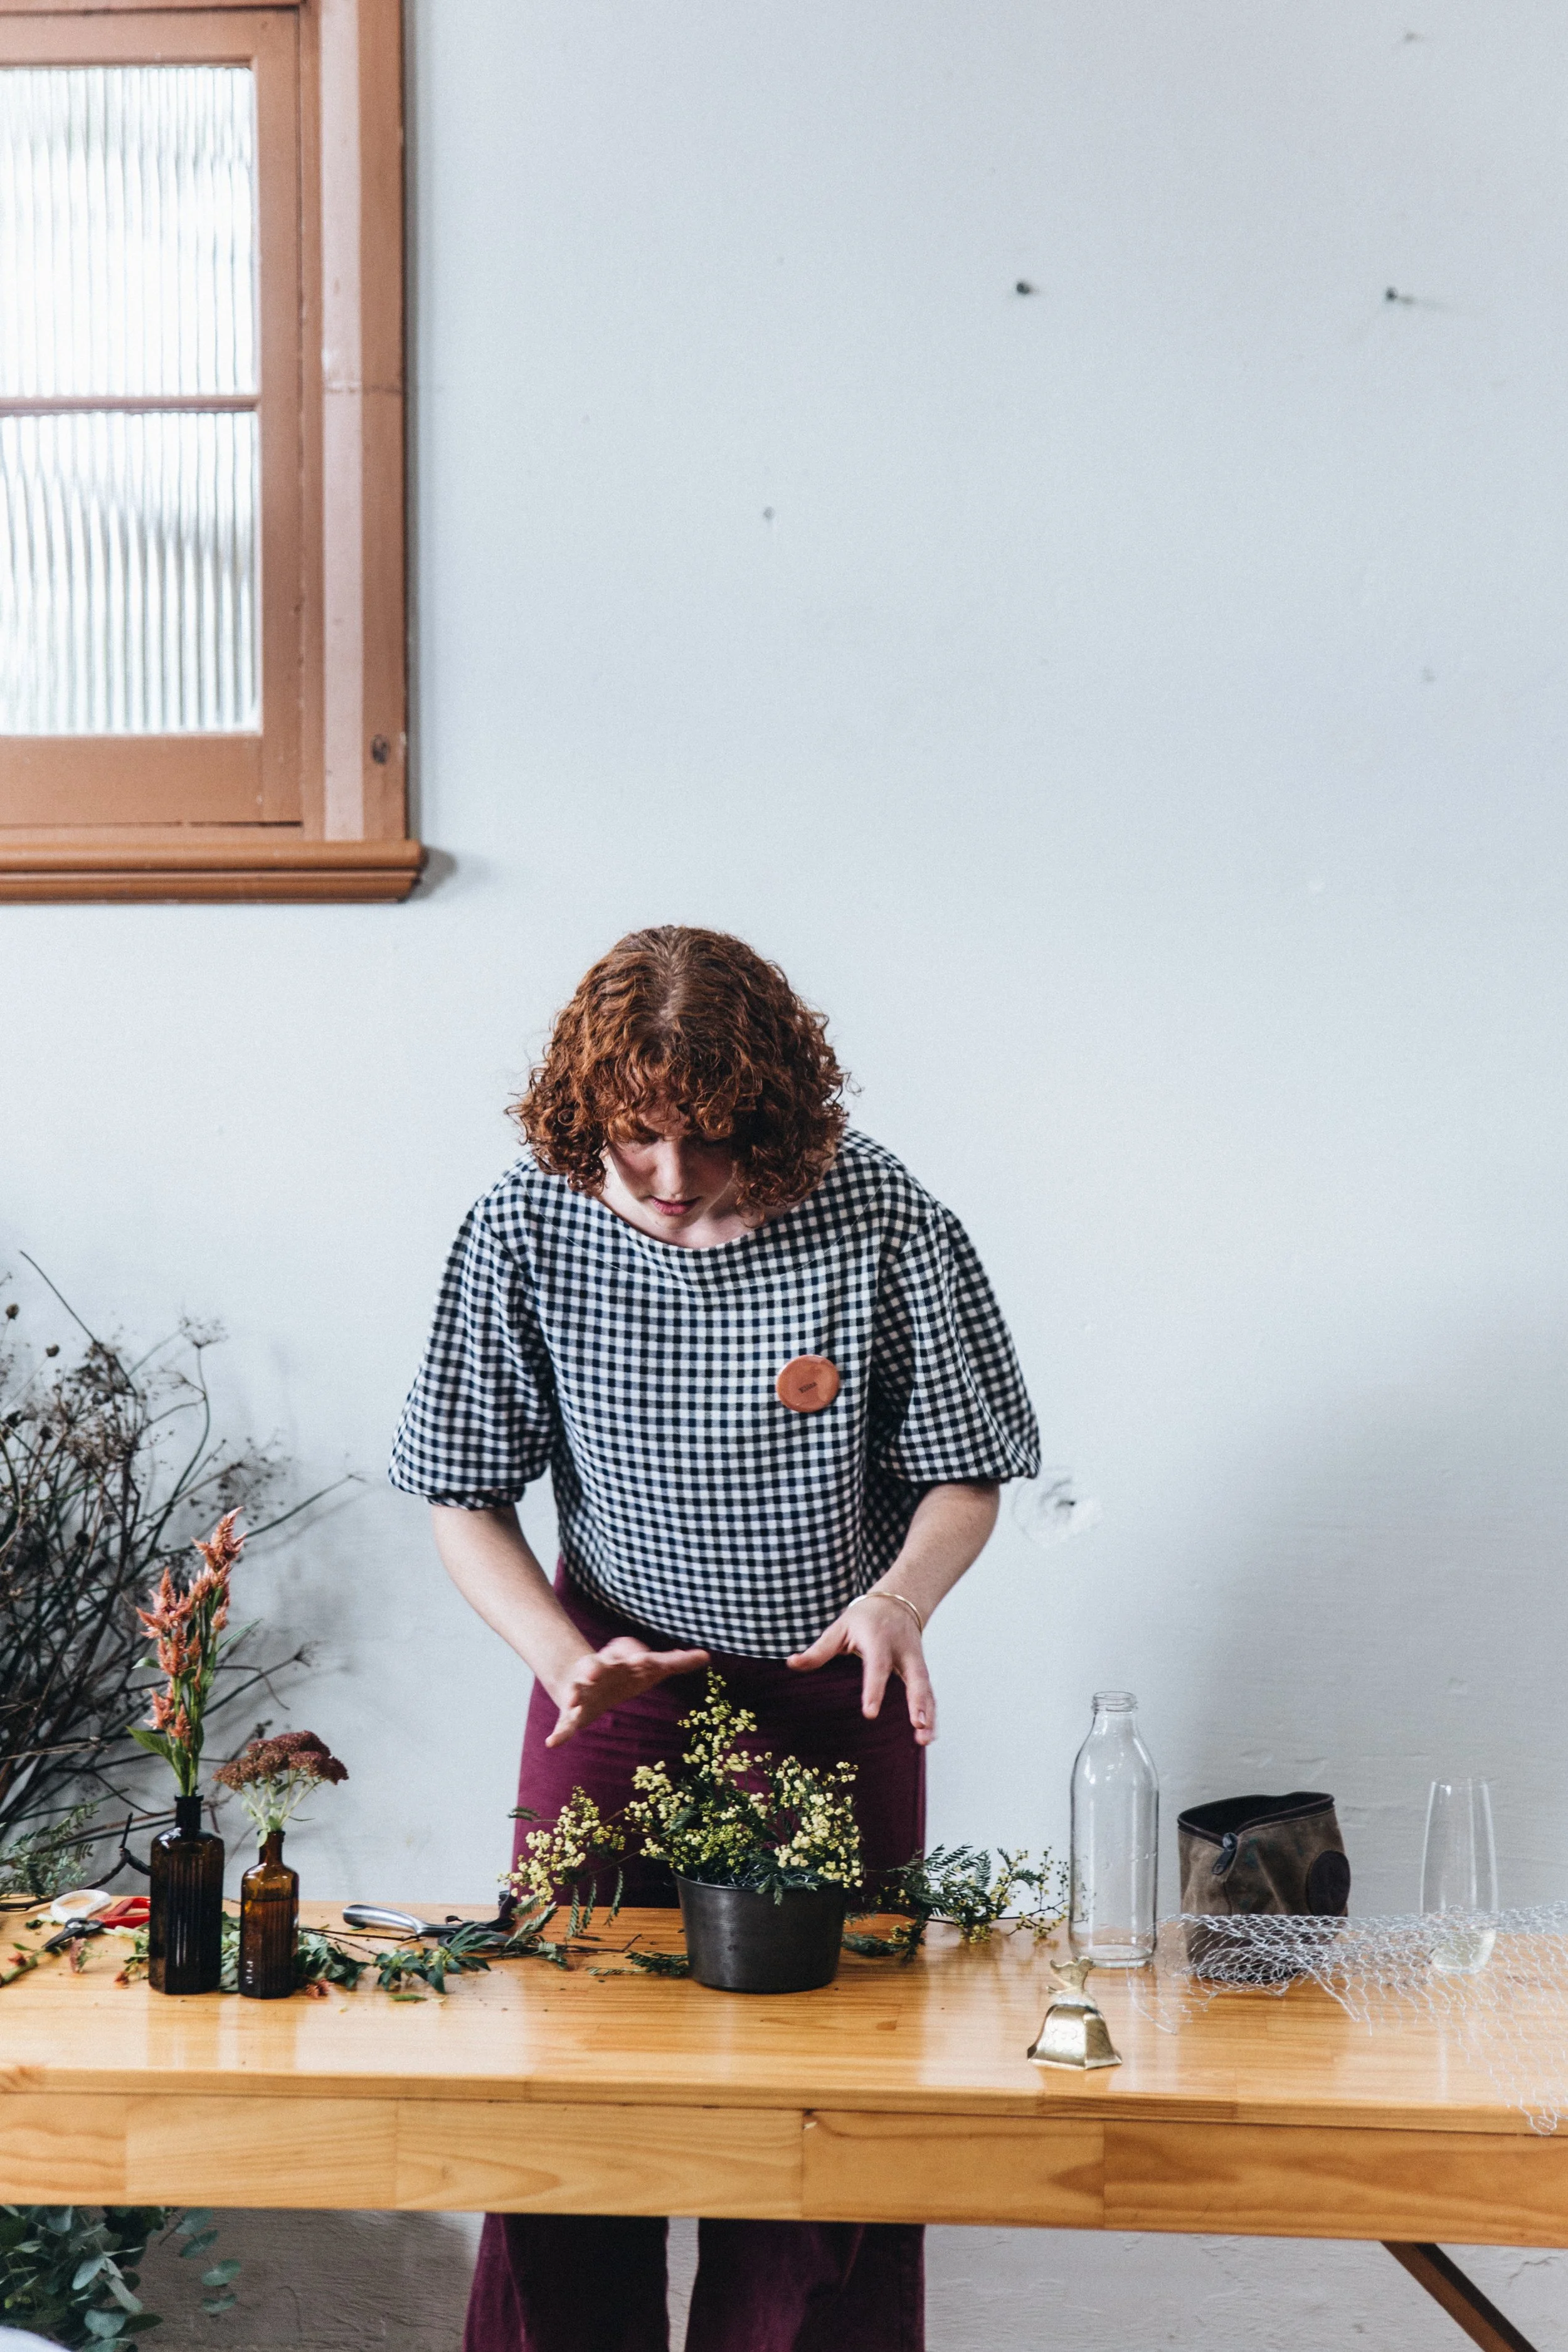
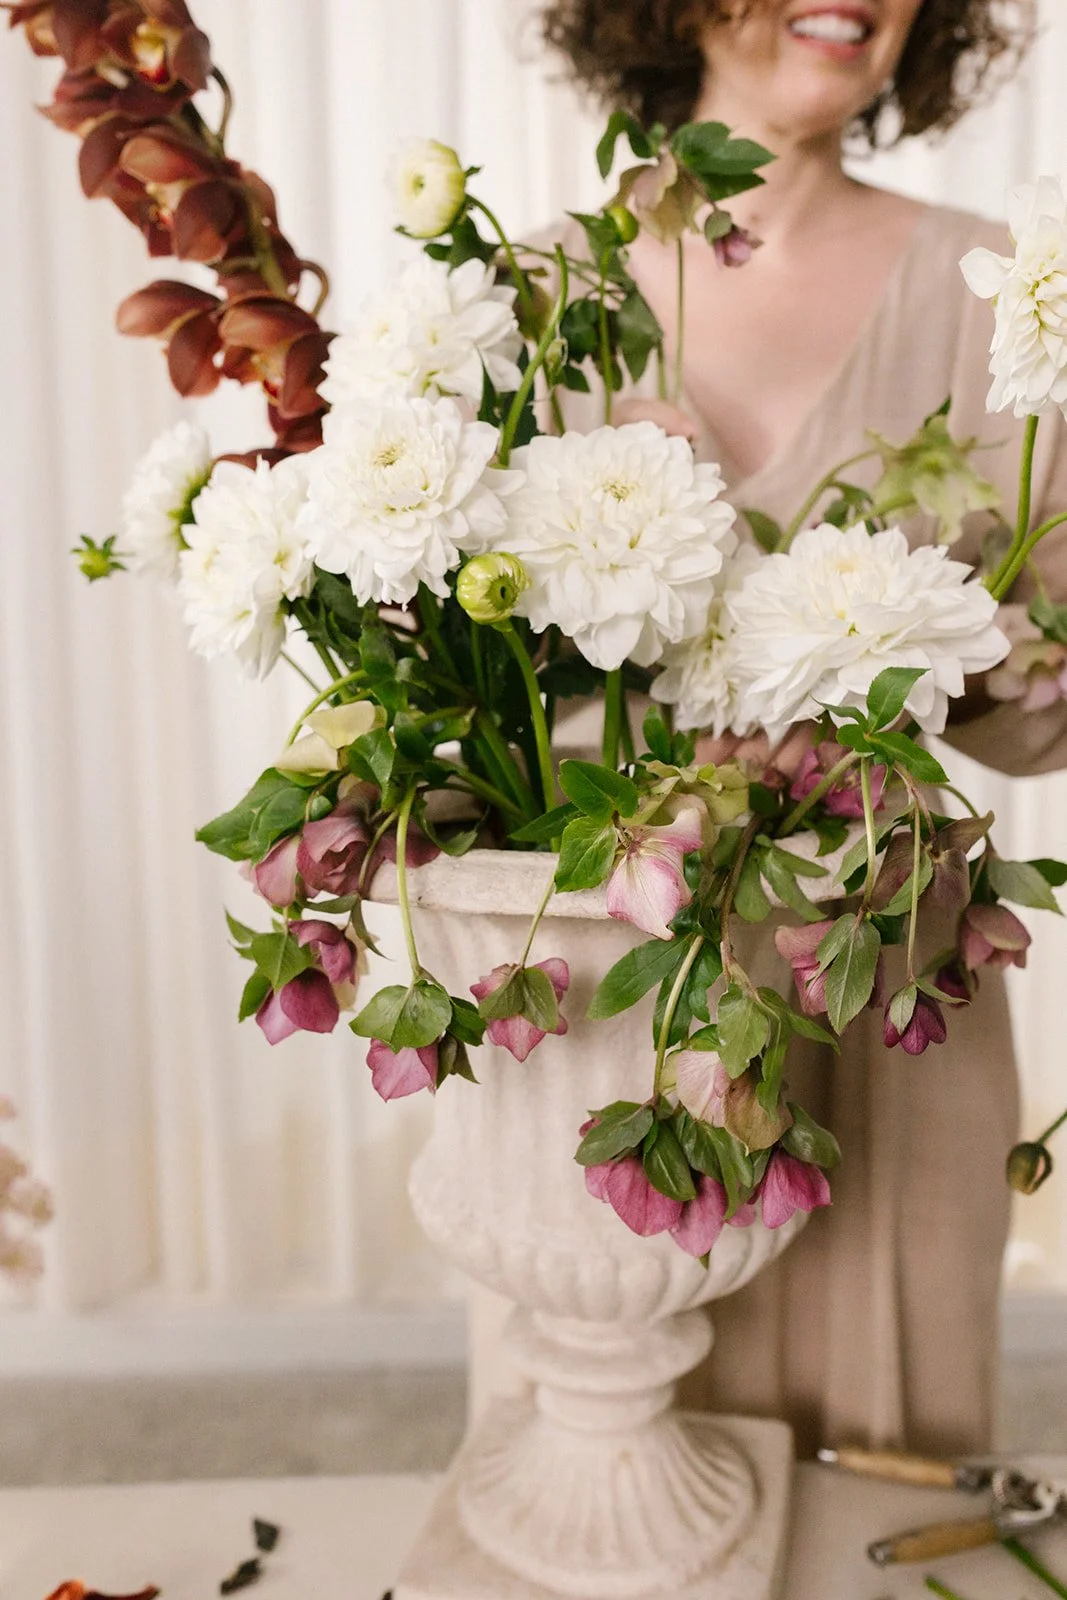
You can see the wire mechanics well in this image of me teaching at one of our events. See how the chicken or aviary wire is used in a kind of ball, so that as you start to build your arrangement, the wire holes keep each stem in place.
A finished masterpiece, by one of our talented students at a teaching event. See how the arrangement is gentle and loose, and all the elements she has chosen work well together colour wise? Also note, a ratio of 1 third vessel, and 2 thirds the height of the botanicals – and lastly the lovely triangle form. A+!
A better close-up of a complex arrangement being built on set while filming this class. Something I personally love when building botanicals is a swoop or a droop. By building these in, I find arrangements look more styled, rather than stiff and formal – too perfect and I find arrangements can look fake.
The aftermath! A collection of our students’ lovely complex arrangements, built with chicken wire at a teaching event.
Now you’ve considered Space, Surroundings and Schedule, learnt your three go-to arrangements, and the tools and types of vessels you’ll need for each – along with some of the basics to the simple arrangement – it’s time to get out there and have a go with the homework for this lesson. What you will need in your toolkit includes:
A good pair of floral secateurs.
Tree loppers – Fiskars are the best.
Aviary wire – you should be able to easily manipulate the wire with your hands, and have a cheap pair of wire snips to cut it.
Kenzans, or flower frogs. Get a few to start with, and if you enjoy using them, I’m sure your collection will grow over time.
Vessels to work with. I can recommend starting out in thrift stores to find a variety of sizes, shapes and colours to work with, and adding to your collection over time.
Please enjoy both appreciating the nature that exists around you, wherever you are in the world, and starting to learn these simple styling tools. I know both will become a great source of joy and inspiration for your creative lives forever more.
Workbook Time. Reach for your workbook, and complete Exercise 6.1, now. You might need a bit of time to gather the tools and equipment you will need, but having these items at hand forever more will be endlessly useful, you’ll see!
“Live in each season as it passes; breathe the air, drink the drink, taste the fruit, and resign yourself to the influence of the earth.”
— Henry David Thoreau
06. Homework
Purchase: Annabelle Hickson’s book A Tree In The House is an excellent manual outlining the mechanics of botanical styling.
Watch: My ultimate dinner party guest, boy does this man make me giggle! Mike Gaffney will teach you the basics of preparing and taking care of your cut flowers so they ‘will last 3 weeks!’.
06. Community
Any work, or ideas you are posting related to this class, please use the hashtags #principlesofstyle and #poss06 so your fellow classmates can connect with you and continue to grow this community.